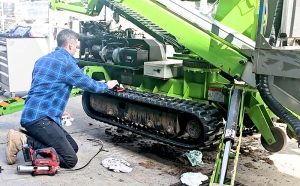
Excavators are powerful and versatile machines, widely used in construction, mining, and agriculture. To ensure they operate smoothly, regular maintenance is essential. One crucial aspect of maintenance is knowing how to change the excavator tracks when they become worn or damaged. In this comprehensive guide, we will take you through a step-by-step process to replace excavator tracks efficiently and safely.
Step 1: Gather the Necessary Tools and Equipment
Before starting the track replacement process, make sure you have all the required tools and equipment ready. This will include a grease gun, a pry bar, a socket set, machinery stands and safety gear such as gloves and eye protection. Additionally, having an operator’s manual for your specific excavator model is invaluable as it provides detailed instructions for track replacement.
Step 2: Park the Excavator on a Level Surface
To ensure stability during the track replacement process, park the excavator on a level and firm surface. Ensure the area is clearly barricaded or taped off to keep unexpected persons or machinery entering the danger zone.
Step 3: Lift the Excavator
Lift the excavator off the ground ensuring there is enough clearance to work safely beneath the machine. This is done by operating the blade down and using the machines hydraulics to raise the machine. Now swing the boom to the opposite end of the machine and lift the machine off the ground whilst using care to keep the machine level and as low as possible. The machine should now be lowered onto the stands, always place the stands on a stable and secure surface to avoid accidents.
Step 4: Loosen the Track Tension
Using the sockets, loosen the track tension by turning the adjuster valve. This will release the tension in the track and make it easier to remove. Placing a piece of timber between the track and sprocket and rotating the track slowly and carefully is an efficient way to reduce the track tension.
Step 5: Ensure the track adjuster is fully retracted
With the excavator lifted and the grease valve released, the tracks should now be lose. Ensure the track adjuster is in the fully retracted position (no visible adjuster rod should be visible) and the idler should be well back inside the track frame. Even a small amount of adjustment remaining can cause difficulty in removing or refitting the tracks
It is advisable at this time to check your sprocket for wear, as the track and sprocket work together, it’s likely that if your tracks need changing so do the sprockets – as one wears down so does the other.
Step 6: Loosen and Remove the Track
Now, with the track fully loose, using the pry bar level the track over and off the front idler. Once off the idler, carefully guide the track out of its position on the sprocket and fully remove while ensuring it doesn’t get entangled with any other components.
Step 7: Install the New sprocket if required
Loosen the bolts holding the old sprocket in place, sprockets often rust into place and can be difficult to remove. A soft hammer can help things if you’re finding it difficult. Once the sprocket is removed, take some time to clean the contact surface on the drive motor. Over time, the contact surface can get a build up of grease or rust which can cause the sprocket to stick or seize. Once it’s clean, put the new sprocket into position and tighten the bolts with a wrench. Make sure to use thread locker on the bolts and tighten to the correct torque setting as specified by the manufacturer.
Step 8: Install the New Track
With the new sprocket in place, it’s time to install the new track. Carefully align the track over the sprocket and then use the pry bar to move it over the front idler, making sure the track’s links fit correctly into the grooves.
Step 9: Re-Tension the Track
Once the new track is on, use the track tensioner to adjust the tension to the manufacturer’s recommended specifications. Check the operator’s manual for the appropriate tension setting for your specific excavator model.
Step 10: Lower the Excavator and Perform a Test Run
Remove the stands and gently lower the excavator back to the ground. Once the excavator is on the ground, conduct a thorough inspection of the track and surrounding components. Perform a test run to ensure the new track operates smoothly without any issues.
Proper maintenance of an excavator, including regular track replacement, is crucial for its efficient and safe operation. By following this step-by-step guide, you can confidently change the excavator tracks, enhancing the machine’s performance and extending its lifespan.
Always remember to refer to the operator’s manual and exercise caution while working with heavy machinery. If you are unsure or it’s best to seek assistance from a professional mechanic or service technician.
If you’re in the market for replacement tracks for your excavator, TKV can provide all the assistance you need. Our experienced team will work with you to find the perfect tracks for your machine, ensuring that they meet all of your specifications and requirements. We offer a wide range of options to choose from, including tracks from the industry’s leading manufacturers. With TKV, you can rest assured that you’re getting the highest quality products at the best possible price. So why wait? Contact us today to learn more about how we can assist you with all of your excavator track needs


